 KES
KES TZS
TZS UGX
UGX ZAR
ZARcPanel allows you to upload your website files easily using File Manager or FTP. This guide explains both methods, including where to upload files so your website works correctly.
Method 1: Upload Website Using cPanel File Manager (Recommended)


Step 1: Log in to cPanel
Open:
Enter your cPanel username and password.
Step 2: Open File Manager
-
In cPanel, go to Files → File Manager
-
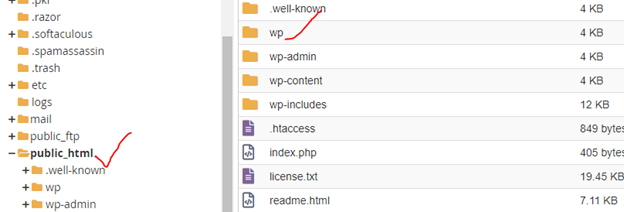
Click public_html
???? Important:
-
public_html= main website directory -
This is where your website files must be uploaded
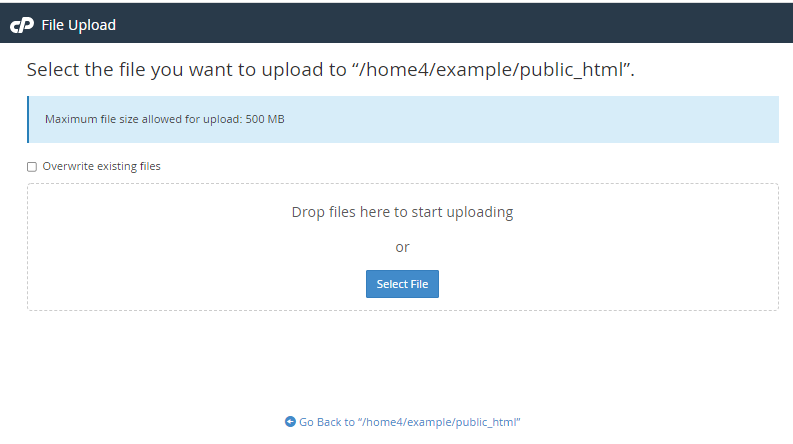
Step 3: Upload Website Files
-
Click Upload (top menu)
-
Select your website files (HTML, PHP, CSS, images, etc.)
-
Wait until upload reaches 100%
✅ Supported file types: .html, .php, .css, .js, .jpg, .png, etc.
Step 4: Extract ZIP File (If Uploaded as ZIP)
Uploading a ZIP file is recommended.
-
Right-click the ZIP file
-
Click Extract
-
Extract files inside
public_html
Your main file should be:
Method 2: Upload Website Using FTP (Advanced Users)
Step 1: Get FTP Details
In cPanel:
-
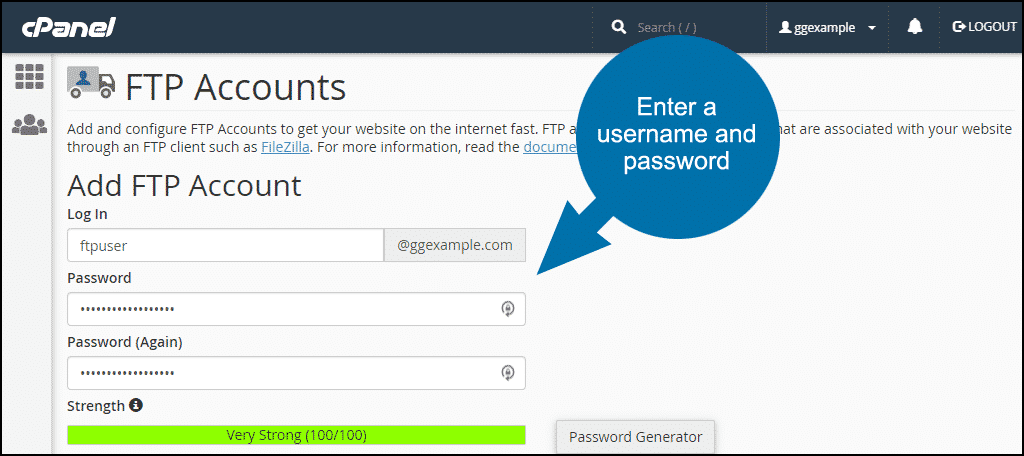
Go to Files → FTP Accounts
-
Note:
-
FTP Server
-
Username
-
Password
-
Port (21)
-
Step 2: Connect Using FTP Client
Use software like FileZilla:
-
Host: your domain or server IP
-
Username: FTP username
-
Password: FTP password
-
Port: 21
Step 3: Upload Files
-
Open
public_htmlon the server side -
Drag and drop your website files
-
Wait for upload to complete
Uploading a WordPress Website (Optional)

Option 1: Fresh WordPress Install
-
Go to Software → WordPress Manager / Softaculous
-
Click Install
-
Follow on-screen steps
Option 2: Upload Existing WordPress Site
-
Upload WordPress files to
public_html -
Import database via phpMyAdmin
-
Update
wp-config.php
Common Mistakes to Avoid
❌ Uploading files outside public_html
❌ Missing index.html or index.php
❌ Not extracting ZIP files
❌ Wrong file permissions
Fix Permissions (If Website Not Loading)
Recommended permissions:
You can set this by right-clicking files in File Manager.
Test Your Website
After upload:
-
Open your browser
-
Visit:
If you see your site — ✅ upload successful.
Troubleshooting
Website Shows Default cPanel Page
-
Remove
index.html(default file) -
Ensure your main file is named correctly
Website Shows Blank Page
-
Enable error reporting
-
Check PHP version
-
Review
.htaccess
Conclusion
Uploading a website to cPanel is simple using File Manager or FTP. Always upload files inside public_html, ensure your index file exists, and test your site after upload.
