 USD
USD TZS
TZS UGX
UGX ZAR
ZARLiteSpeed is a high-performance web server that significantly improves WordPress speed, security, and scalability. When combined with the LiteSpeed Cache (LSCache) plugin, it delivers excellent performance with minimal server load.
This guide explains how to properly configure LiteSpeed for WordPress step by step.
Requirements
Before you begin, make sure:
-
Your hosting uses LiteSpeed Web Server
-
WordPress is already installed
-
You have WordPress admin access
-
SSL (HTTPS) is enabled (AutoSSL recommended)
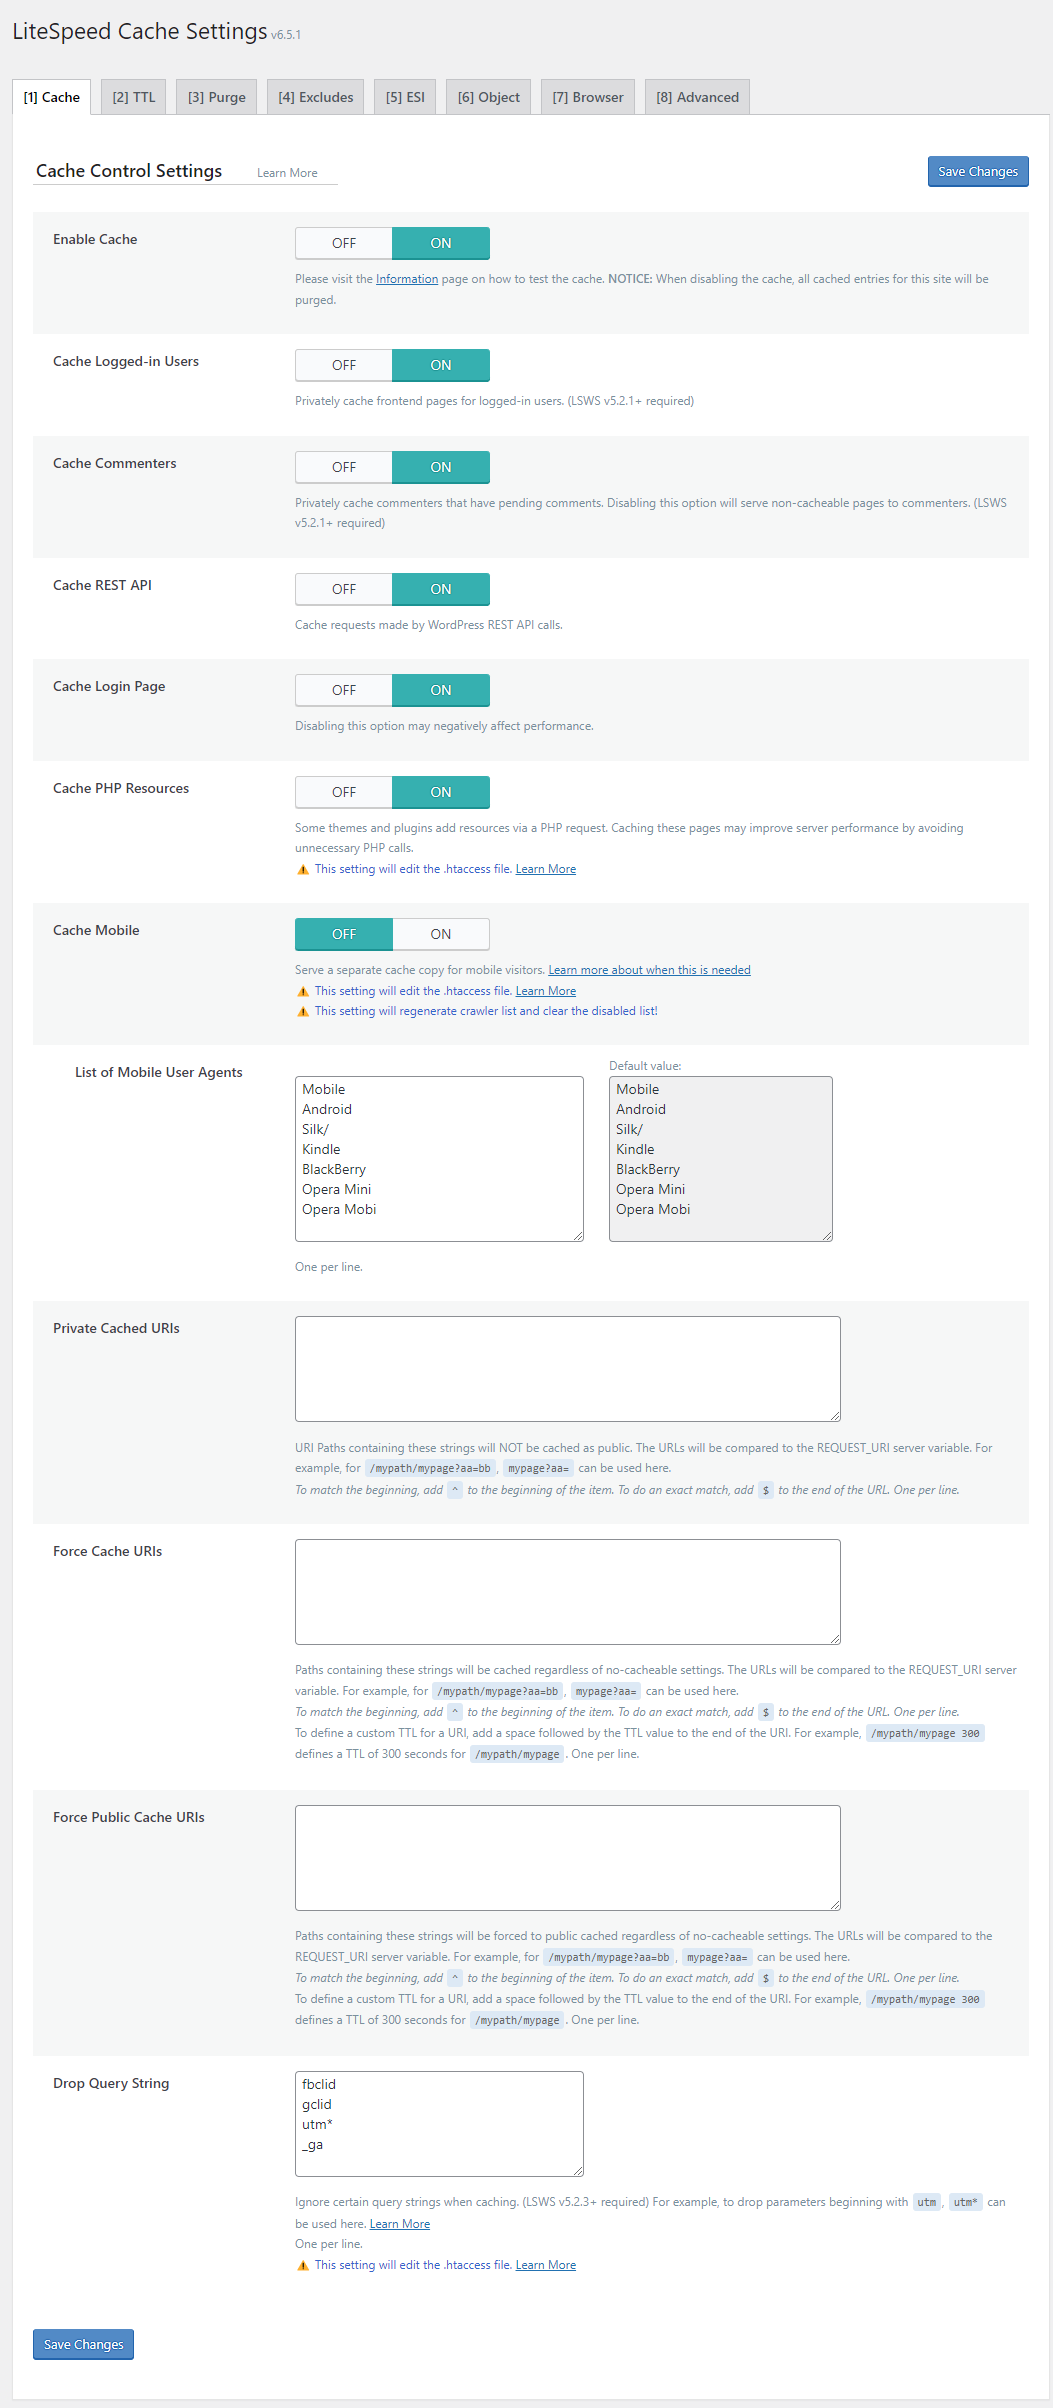
Step 1: Install LiteSpeed Cache Plugin

-
Log in to WordPress Admin
-
Go to Plugins → Add New
-
Search for LiteSpeed Cache
-
Click Install → Activate
✅ The plugin automatically detects LiteSpeed server.
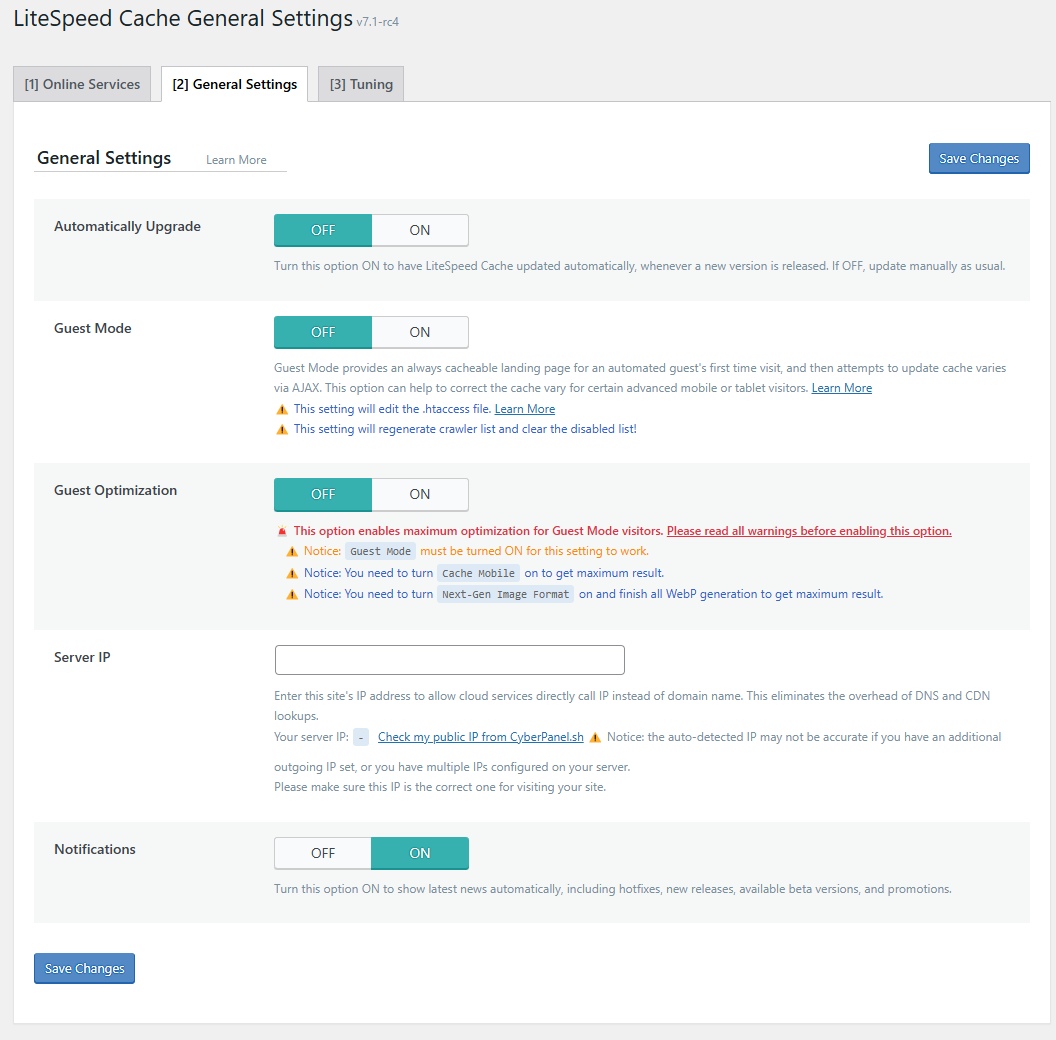
Step 2: Enable LiteSpeed Cache
-
Go to LiteSpeed Cache → General
-
Ensure:
-
Enable LiteSpeed Cache: ✅ ON
-
-
Click Save Changes
Step 3: Configure Cache Settings (Recommended)
Enable:
-
Enable Cache: ON
-
Cache Logged-in Users: OFF
-
Cache REST API: ON
-
Cache Login Page: OFF
-
Serve Stale: ON
???? These settings prevent admin conflicts while caching visitors.
Step 4: Optimize CSS, JS & HTML
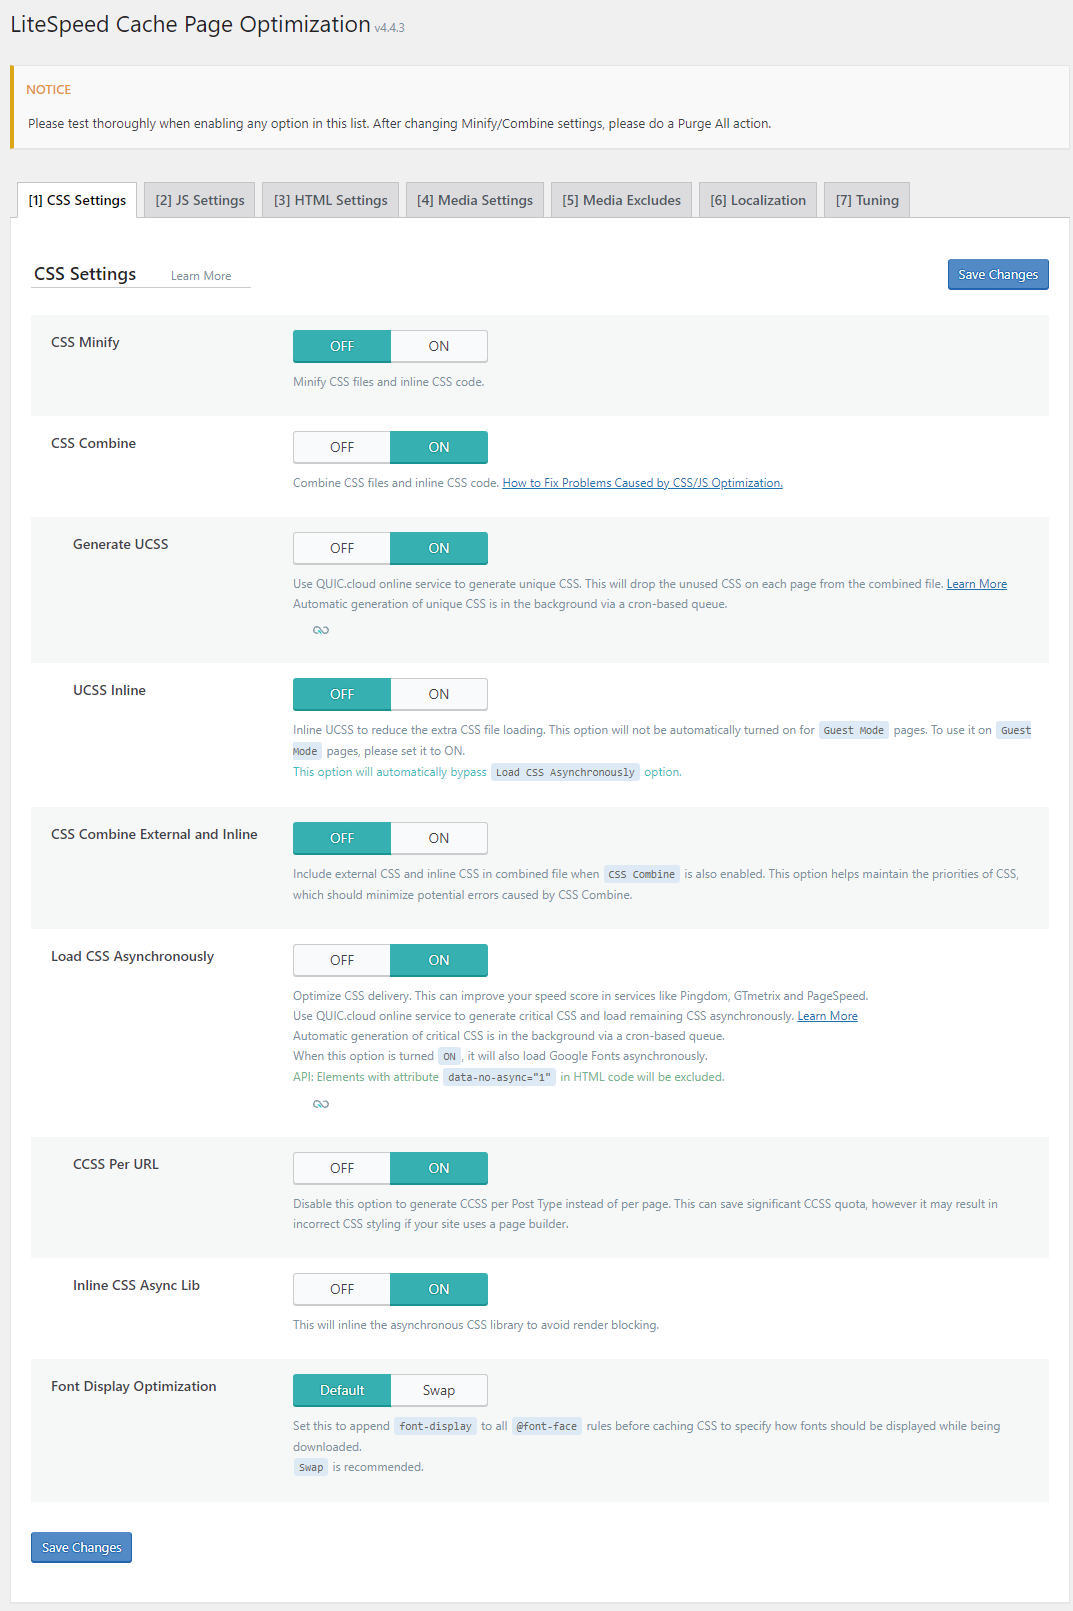

Recommended:
-
HTML Minify: ✅ ON
-
CSS Minify: ✅ ON
-
JS Minify: ✅ ON
-
Load CSS Asynchronously: ✅ ON
-
Combine CSS/JS: ❌ OFF (safer)
-
Remove Query Strings: ✅ ON
???? If layout breaks, disable async CSS first.
Step 5: Enable Image & Media Optimization
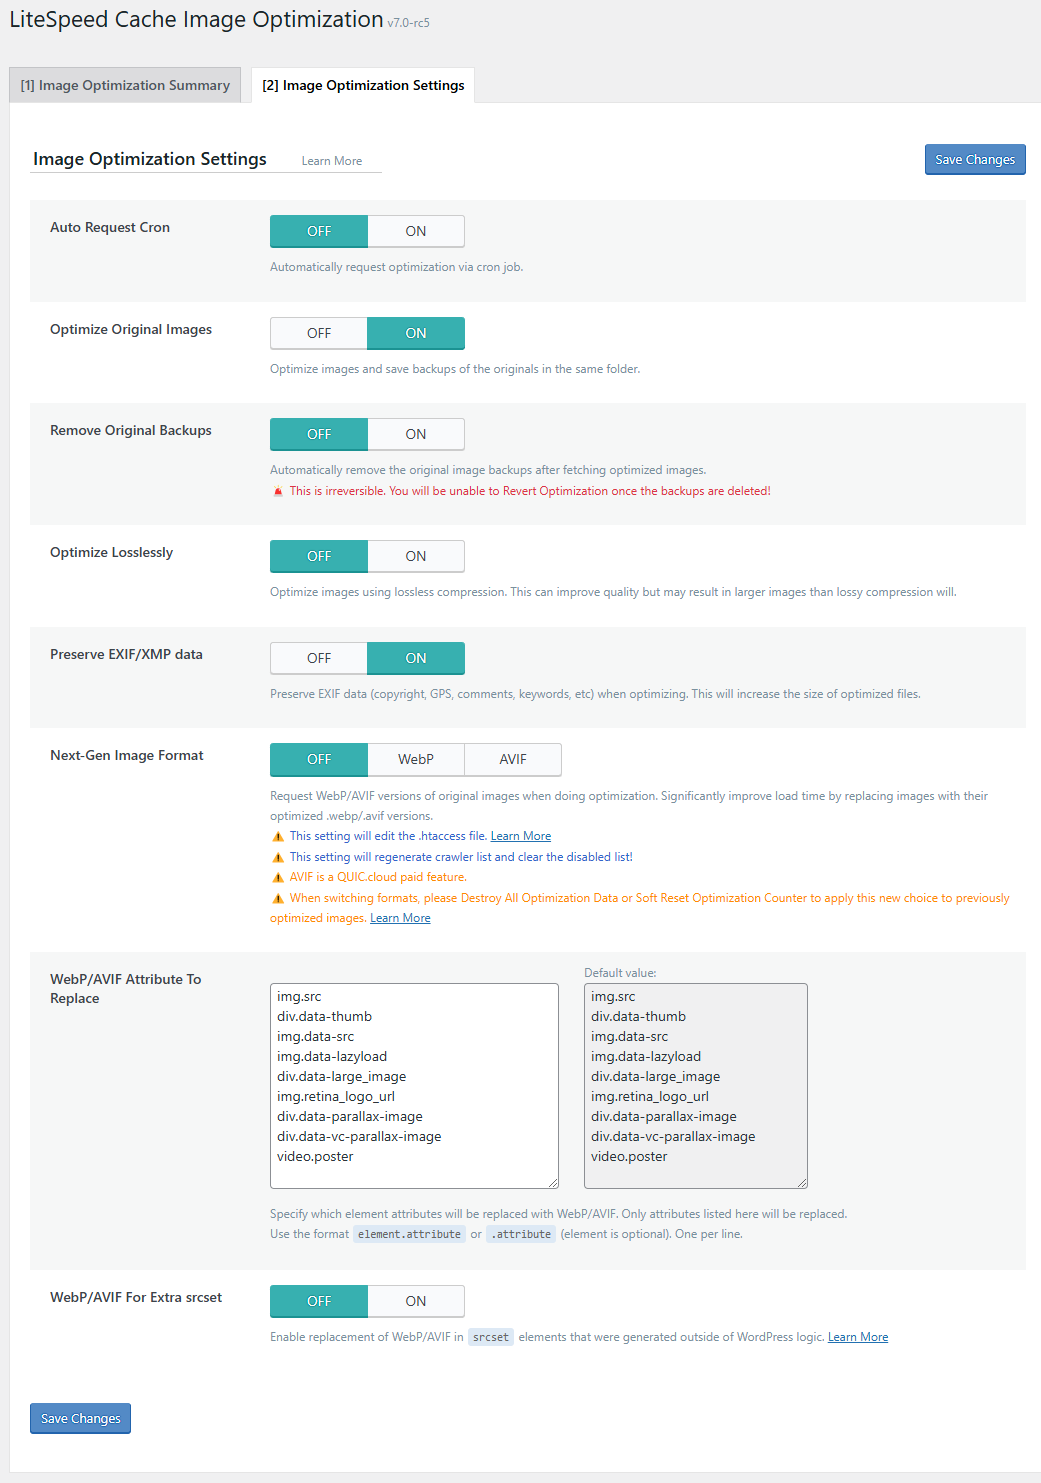
Enable:
-
Lazy Load Images: ✅ ON
-
Lazy Load iFrames: ✅ ON
-
Image Optimization: ✅ ON
-
Generate WebP Images: ✅ ON
Step 6: Database Optimization
Use:
-
Clean post revisions
-
Clean expired transients
-
Optimize tables
⏱ Recommended: Weekly cleanup, not daily.
Step 7: Browser Cache
-
Browser Cache: ✅ ON
This improves repeat visit speed.
Step 8: Clear and Test Cache
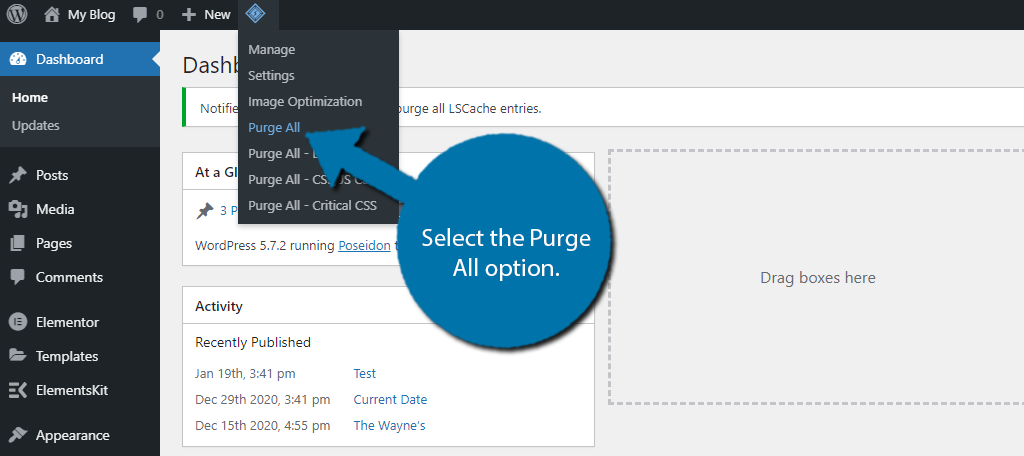
-
Go to LiteSpeed Cache → Toolbox
-
Click Purge All
-
Open your website in an incognito browser
-
Test pages and speed
Fix Common Issues
404 Errors After Enabling LiteSpeed
-
Go to Settings → Permalinks
-
Click Save Changes
Website Layout Broken
-
Disable Combine CSS/JS
-
Disable Async CSS
-
Purge cache and test again
Cache Not Working
-
Confirm hosting uses LiteSpeed (not Apache)
-
Disable other caching plugins
-
Check
.htaccesspermissions
Best Practices
✅ Use only one caching plugin
✅ Always purge cache after changes
✅ Keep WordPress & plugins updated
✅ Backup before optimization
Performance Benefits
-
Faster page load times
-
Better Google PageSpeed scores
-
Lower CPU and RAM usage
-
Improved SEO and user experience
Conclusion
Configuring LiteSpeed for WordPress is one of the most effective ways to boost website performance. With the right cache, optimization, and media settings, your site will load faster and handle traffic more efficiently.
